After being constantly hounded by several people, I’ve finally gotten around to writing this post.
Instructional blog posts on getting a Raspberry Pi to do just about anything imaginable are a dime-a-dozen on the internet. That means, a lot of the stuff I’m writing in this post are not new, and are stuff I also learned from reading blog posts and wikis. I however am bringing a uniquely Nigerian perspective, and this might be useful to others trying to accomplish something similar in a similar environment.
Now, without much ado, lets get into it.
What exactly is a Raspberry Pi?

According to the guys that made it,
“The Raspberry Pi is a low-cost credit-card sized computer that plugs into your TV and a keyboard”.
It was originally designed for the educational purposes, especially for kids, but its uses have ballooned over the years and now, it can be found doing stuff like running Home Theatre software, controlling robots, home automation/ surveillance systems, etc.
I was originally interested in the Raspberry Pi just as a device for experimentation, and the extremely cheap price of $35 made it even more appealing. I bought this pack from Amazon and got the Pi along with a clear case, HDMI cable, Micro USB power pack and an 8gb SD card preloaded with some Pi software for Noobs.
I got it sent to Nigeria through Shippyme.
Setting up
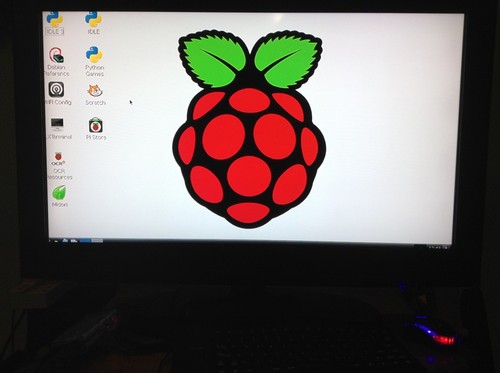
Setting up the Raspberry Pi is relatively easy to do, even more so if you have Linux experience (as I do), but still fairly easy if you don’t. The Raspberry Pi folks officially recommend a variant of Debian Linux called Raspbian. Since that was one of the preloaded OSes that came with my SD Card, I loaded it up first to see how things ran. If you don’t go the route of getting the pack, you would have to install Raspbian yourself. The setup process is relatively painless but the download would set you back 500+ Mb.
Raspbian is a full featured debian distribution with all its binaries recompiled against the ARM architecture which the Pi’s CPU has. It comes with a modern Desktop environment and has all the important bits of any OS. Overall, its pretty boring. Of course, there are things that can be done to spice up Raspbian and add some extra features, but I didn’t linger on Raspbian to try any of them out.
The Raspberry Pi is essentially a Computer board. Therefore, in order to use it, accessories such as a Keyboard, Mouse and even power supply have to be added externally. The Pi possesses two full USB ports for the peripherals, as well as a HDMI port for Digital Video/Audio output, Composite video and 3.5mm audio jack for Analogue output. The Pi doesn’t have a Wireless receiver, but it does have an RJ45 Ethernet port for all your networking needs. This turned out to be a bit of a limitation for me, but I was able to overcome it later with a bit of spending.
Issues
The only major issue I had while setting up my Pi was the fact that I use a MiFi device to connect to the internet. The device broadcasts a wireless network, and doesn’t have an Ethernet port. Since the Raspberry Pi doesn’t have a wireless card, this posed a bit of a problem as regards getting the Pi connected to the internet.

I eventually overcame this by getting a fairly cheap Wireless Access point (TP-Link WA701ND) which has one Ethernet port as well as broadcasting a wireless network. The device doesn’t have a SIM Slot though, so it can’t be used to replace my MiFi.
I setup the TP-Link access point as a Wireless repeater to the network propagated from the MiFi. This essentially made the access point connected to the same network as MiFi, and meant that any device connected to the Access point via LAN (in this case, the Pi) also got connected to the same network originating from the MiFi. This fixed my issue with getting the Pi online.
Using the Raspberry Pi
Once you have everything setup the way you like, its time to actually use the device to get some work done (or not, depending on what you want). In my case, I was interested in using the Pi as a Home Theatre PC. This meant Raspbian wasn’t a good fit for me. Luckily, there are two excellent solutions available for the Pi in this field, both based on XBMC. OpenELEC and RasPlex.
In the next article, I’ll discuss how I got both setup, my experiences with them, and also discuss how to get content streamed from your media server PC, phone or tablet to your Raspberry Pi.
This post first appeared on Muyiwa’s blog.